Business Configurations
As an administrator, you can define business configurations (for example, the verbiage of notifications, membership criteria). These configurations reflect in the customer-facing application at run-time.
You can manage the following configurations:
- Membership Eligibility Criteria
- Business Banking
- Alerts Configuration
Membership Eligibility Criteria
Use this feature to define and manage membership eligibility criteria that enable the user onboarding process.
Criteria examples:
- Relative of a credit union member
- Current or ex-employee of a company
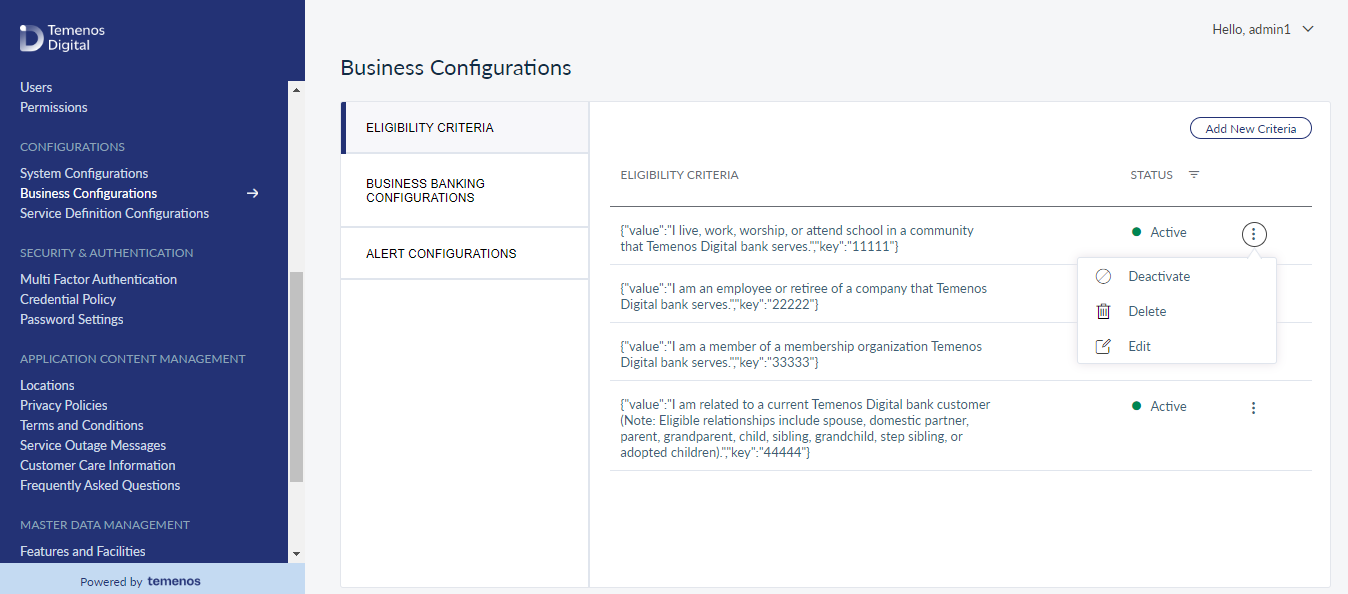
Menu path: Configurations > Business Configurations > Eligibility Criteria
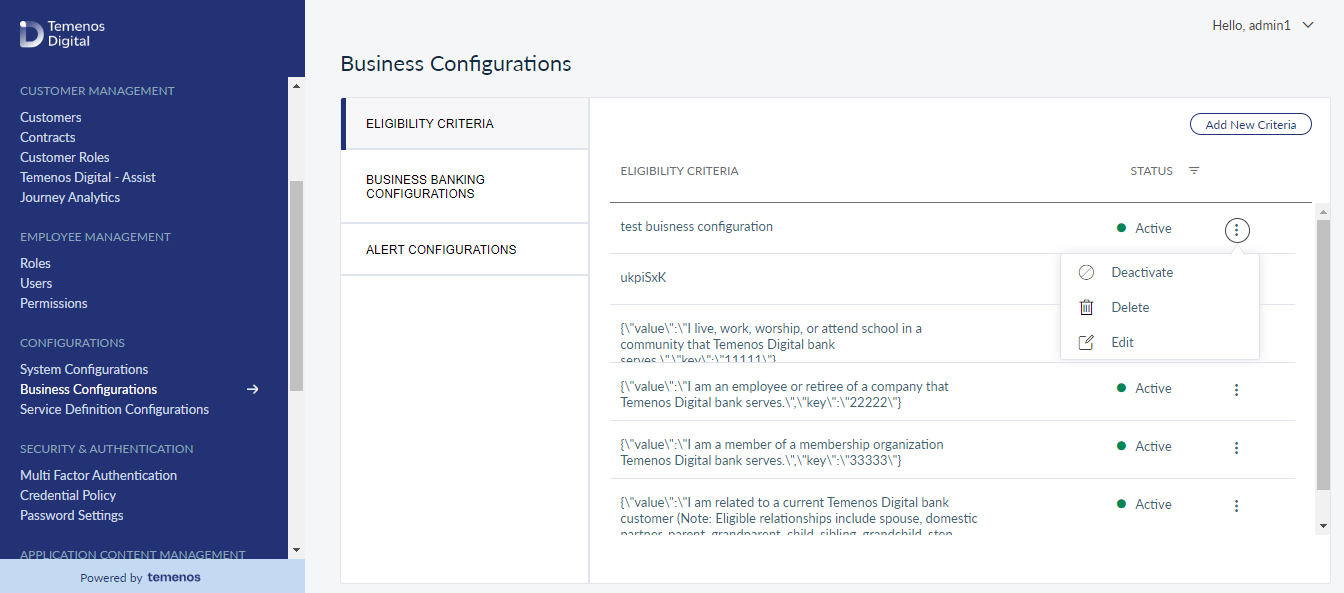
The app displays the Business Configurations screen with Eligibility Criteria on the left pane and the list of criteria already created on the right pane. This is also the main page of the Business Configurations module.
You can do the following:
- Click Add New Criteria to add eligibility criteria.
- View the list of criteria already created. The criteria is added as the string value for the Value parameter. You can do the following from the list:
- Filter the criteria by Status.
- From the contextual menu, you can edit, delete, activate the inactive criteria or deactivate the active criteria.
Add a Criteria
Use the feature to add eligibility criteria.
Menu path: Configurations > Business Configurations > Add New Criteria
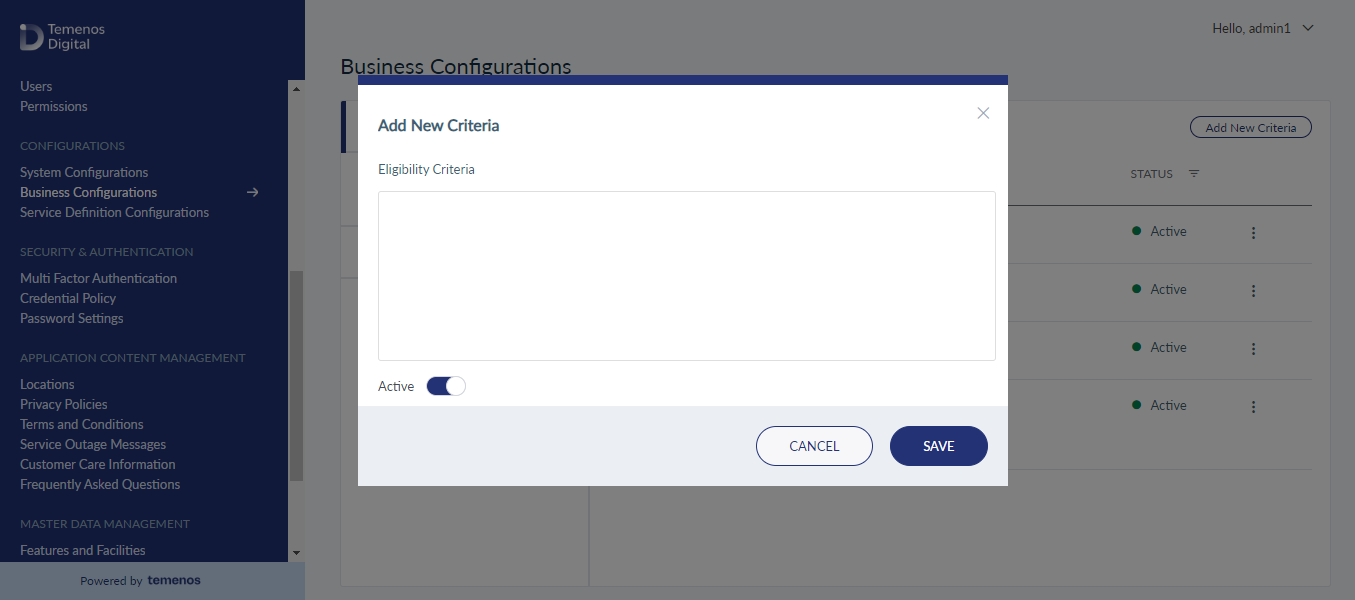
On the Add New Criteria screen, add the eligibility criteria description and select the status. By default the status is Active.
Click Save to save the details. The criteria are added to the criteria list.
Edit Criteria Details
Use the feature to edit the details of eligibility criteria.
Menu path: Configurations > Business Configurations > Contextual menu > Edit
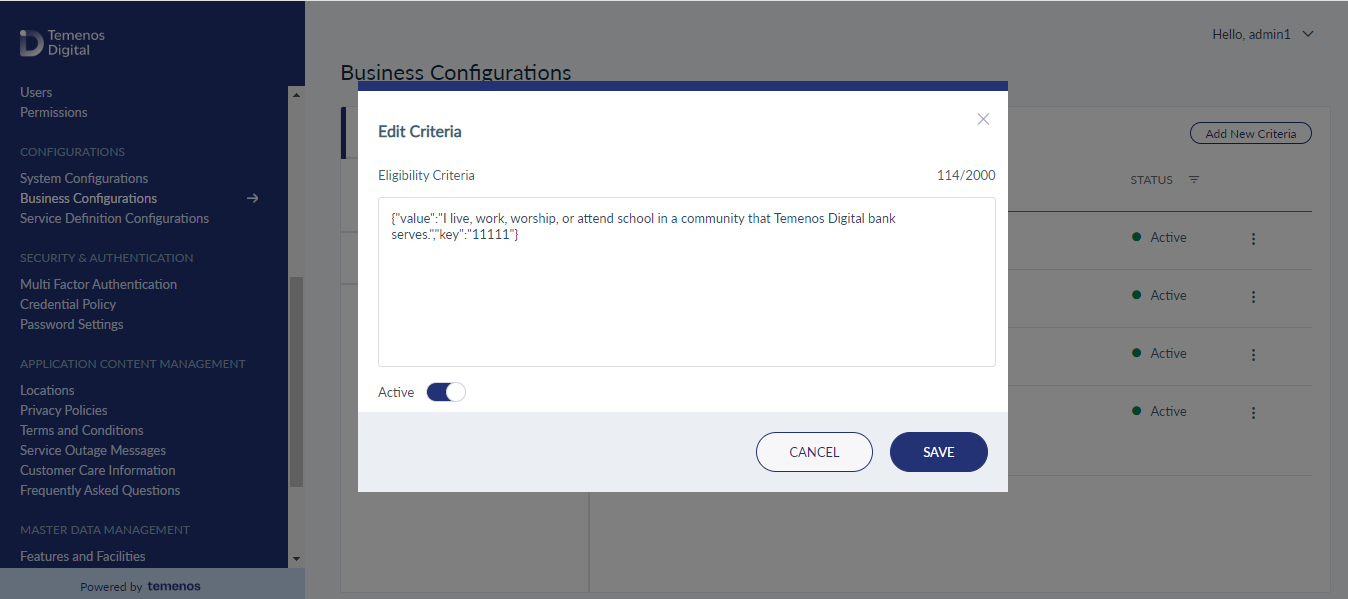
The edit screen is similar to the add a criteria screen with the provision to modify the detail.
On the Edit Criteria screen, make the changes as required, and save the details.
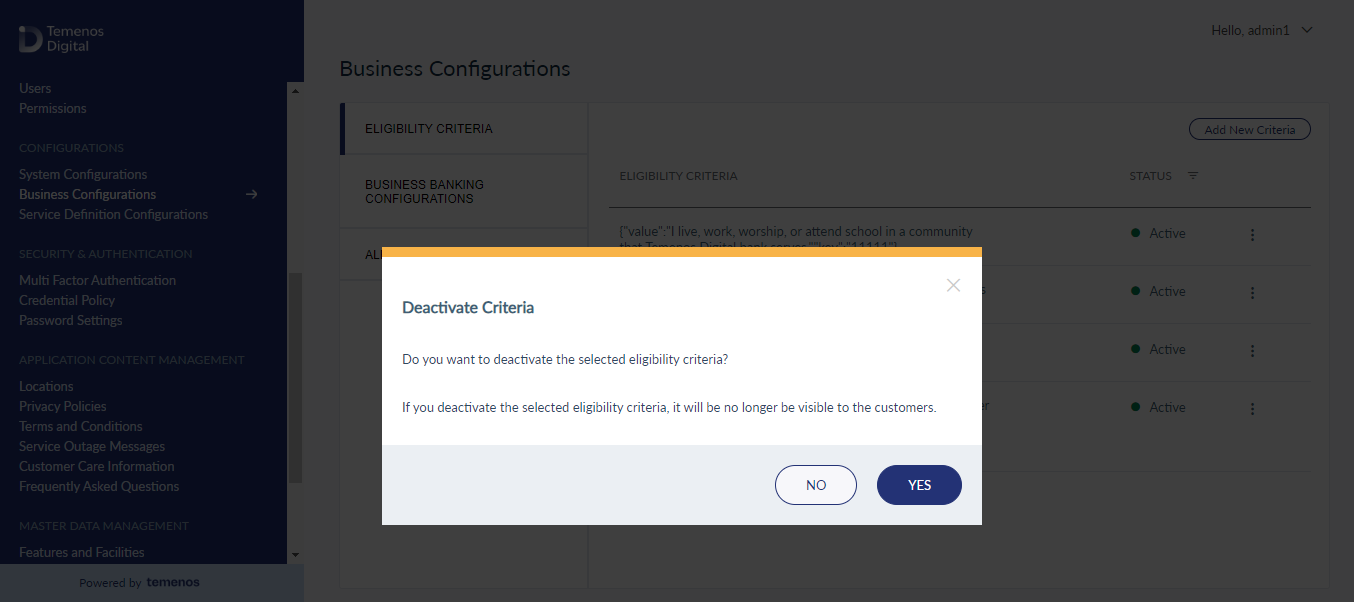
Update Status
Use the feature to activate or deactivate eligibility criteria.
Menu path: Configurations > Business Configurations > Contextual menu
Click the contextual menu available on each row and update the status based on the current status of the criteria. The following statuses are available: Activate, Deactivate. For example, if the current status Active, you can deactivate the criteria. Only active criteria will be displayed during the onboarding process in the customer-facing application.
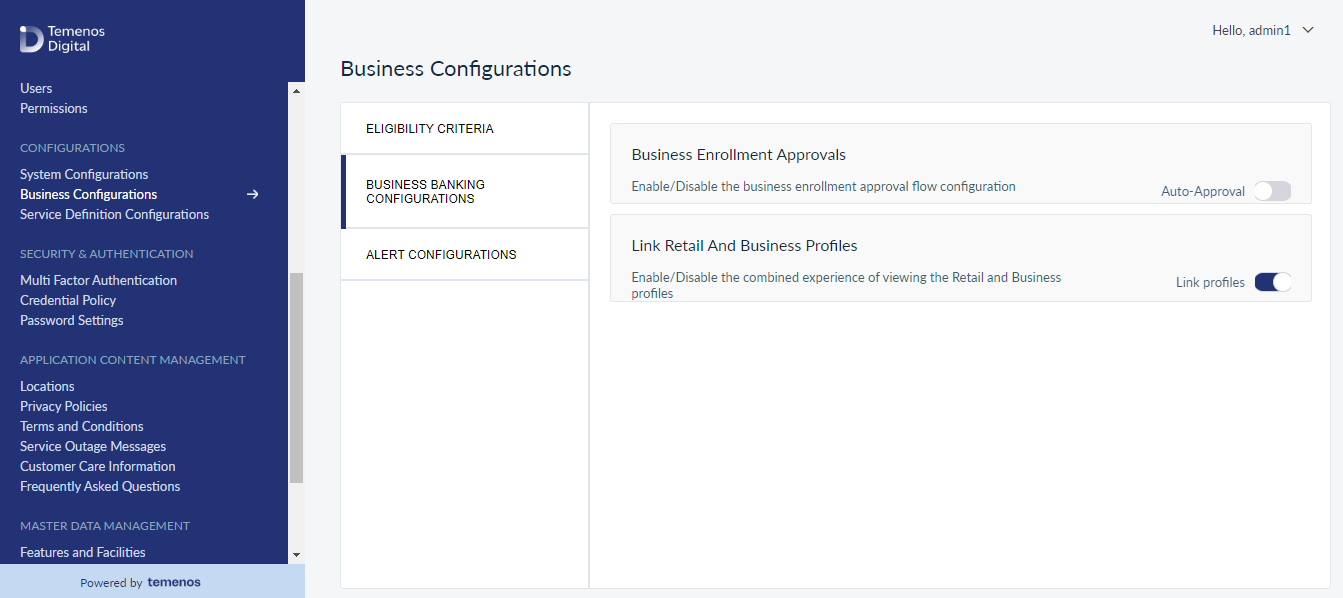
Business Banking Configurations
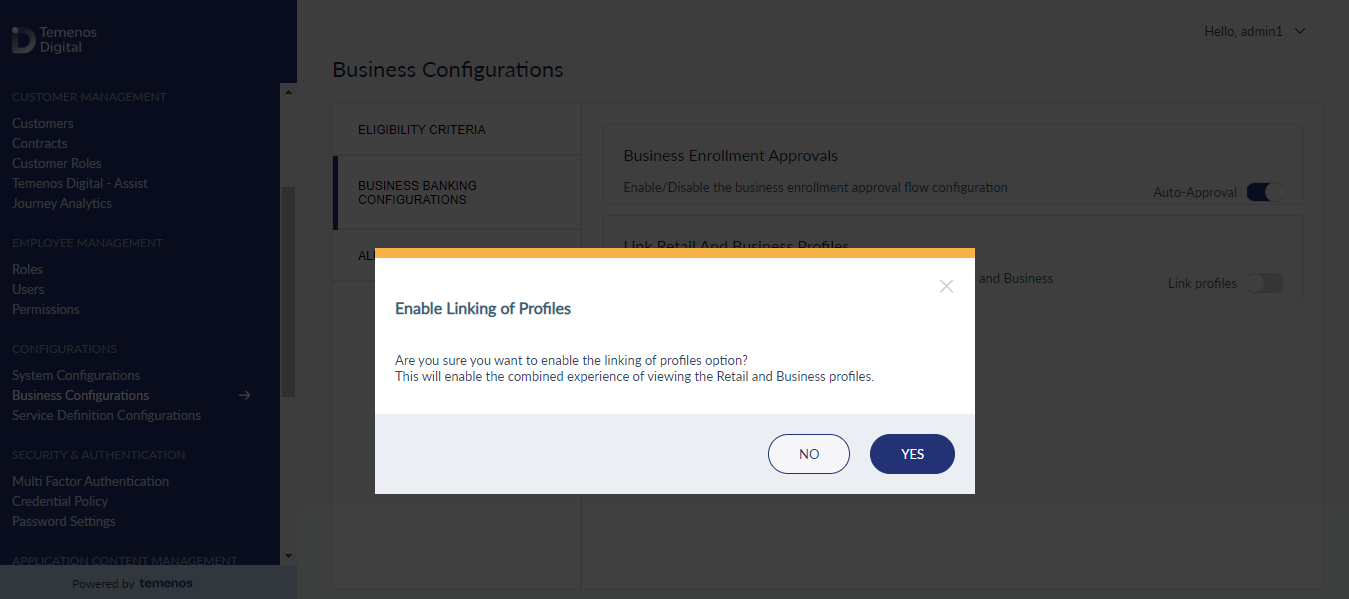
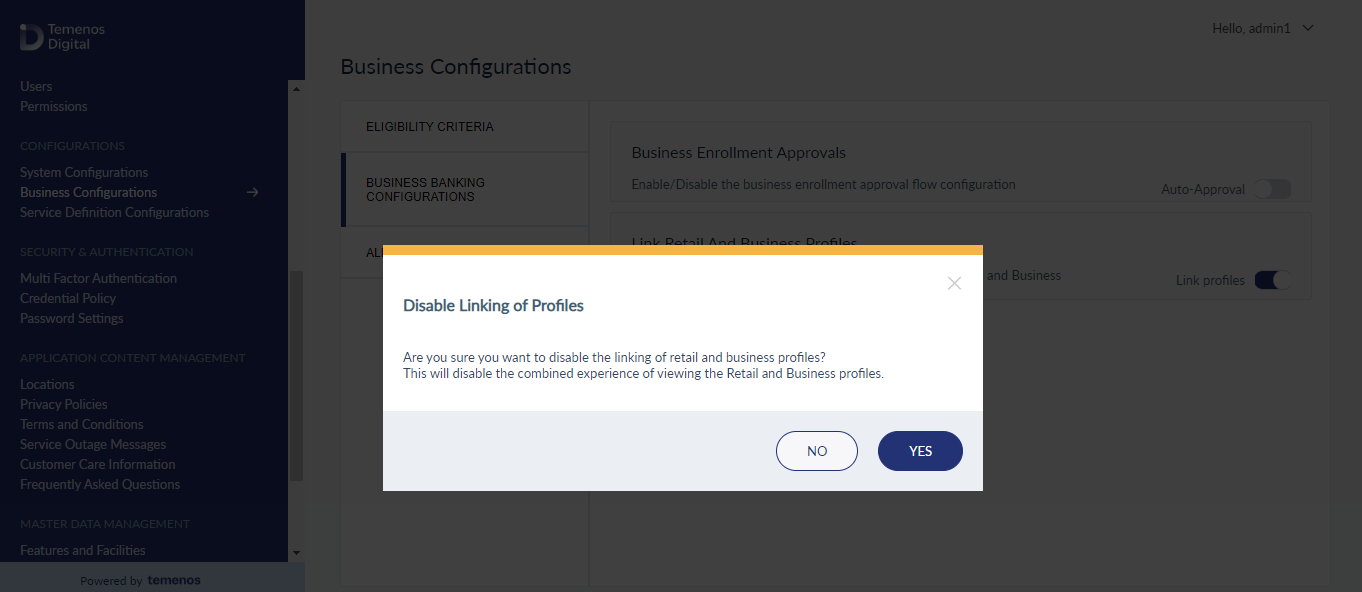
Use this feature to manage the business enrollment approval process and to manage the options related to profile linking (retail and business).
Business Banking Configurations
This section contains two major options:
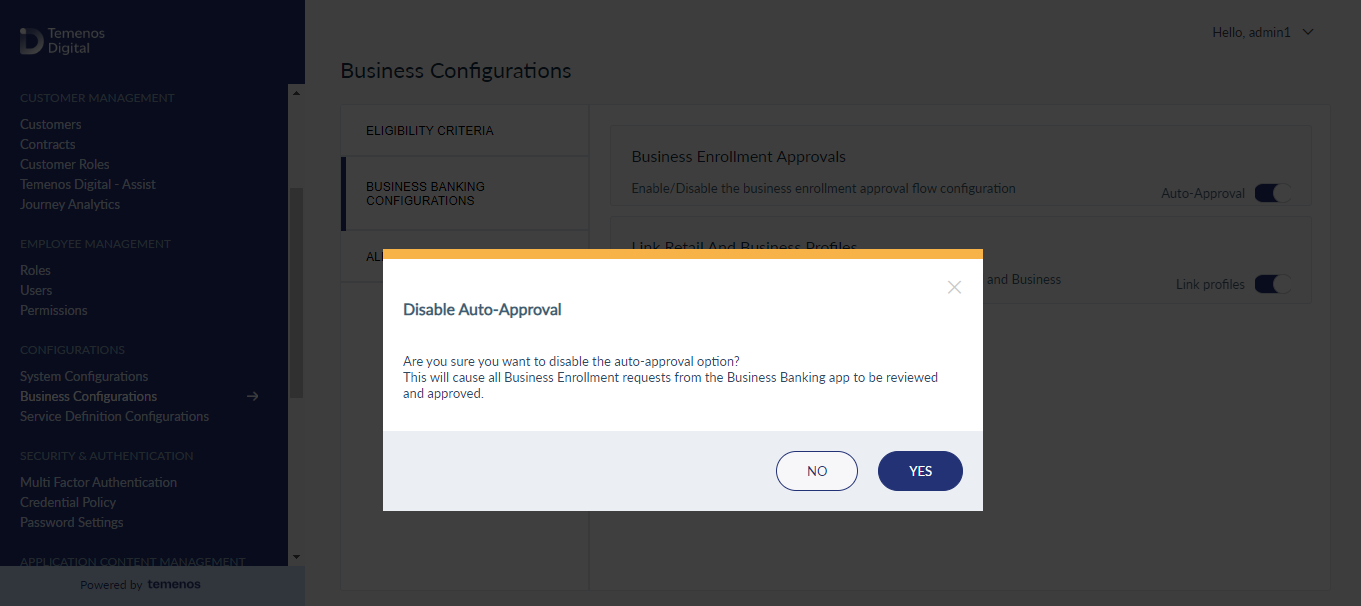
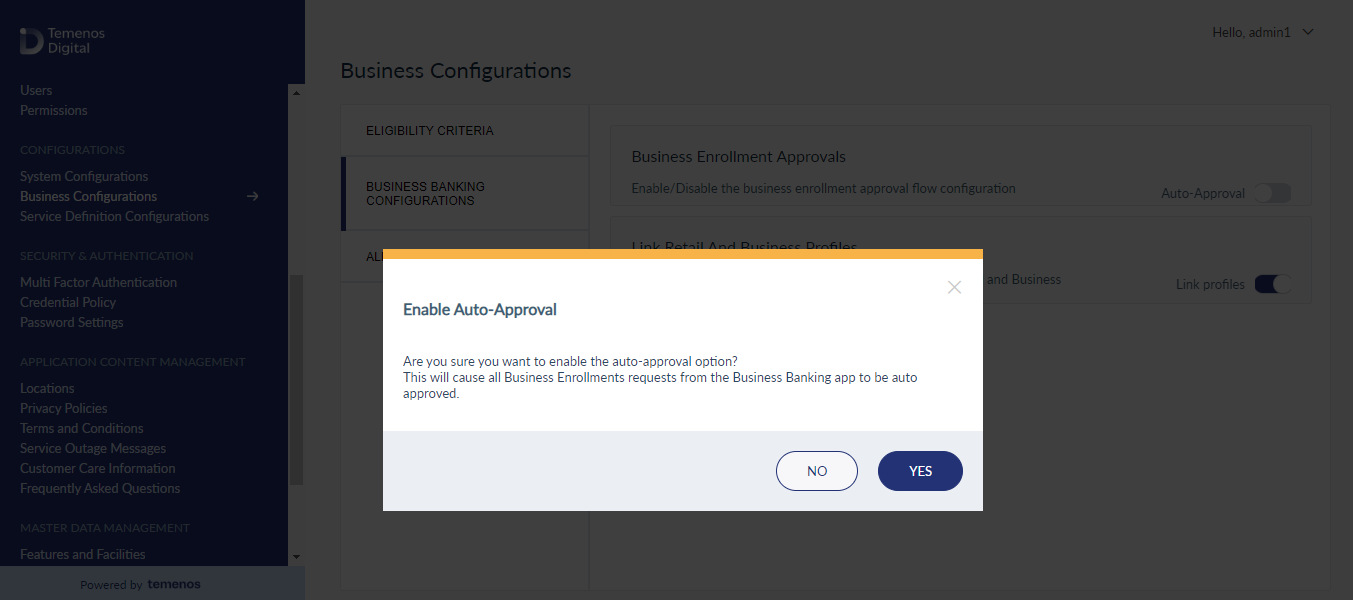
- Business Enrollment Approvals: You can enable or disable this configuration from here. If you enable this configuration, all the business enrollment requests received from the Online Banking application are approved automatically.
If you disable it, business enrollment requests are held in the pending state. You must review the request manually from the Companies module and either approve or reject to complete the enrollment process. If you disable this configuration, all the new requests are automatically approved and if there are any pending requests, they have to be approved manually as they won't get approved automatically. - Link Retail and Business Profiles: You can enable or disable this configuration from here. If you enable this configuration, the Customer Management section will display the option to link or de-link the Retail and Business banking profiles for the customers who have both the profiles. If there are any existing linked profiles, you cannot disable this option.
Alerts Configuration
- You can manage the alert configurations from here. The configurations which are set here will be applied to the Alerts module in the online banking application.
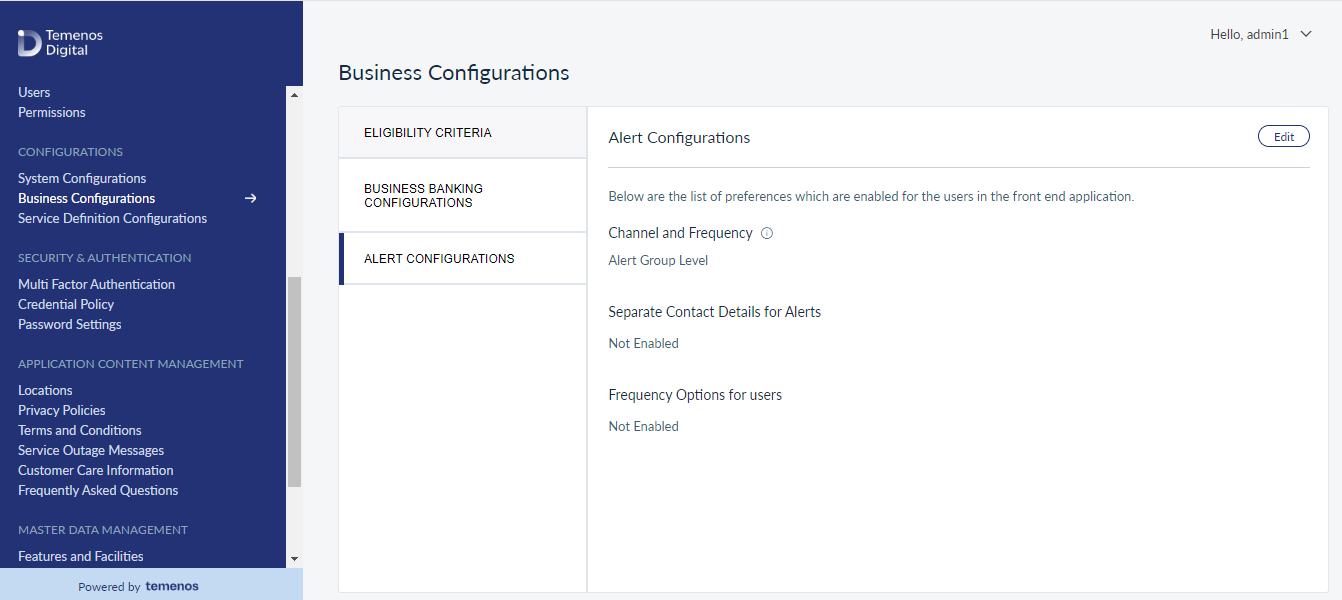
- Click Edit and you can manage the following configurations.
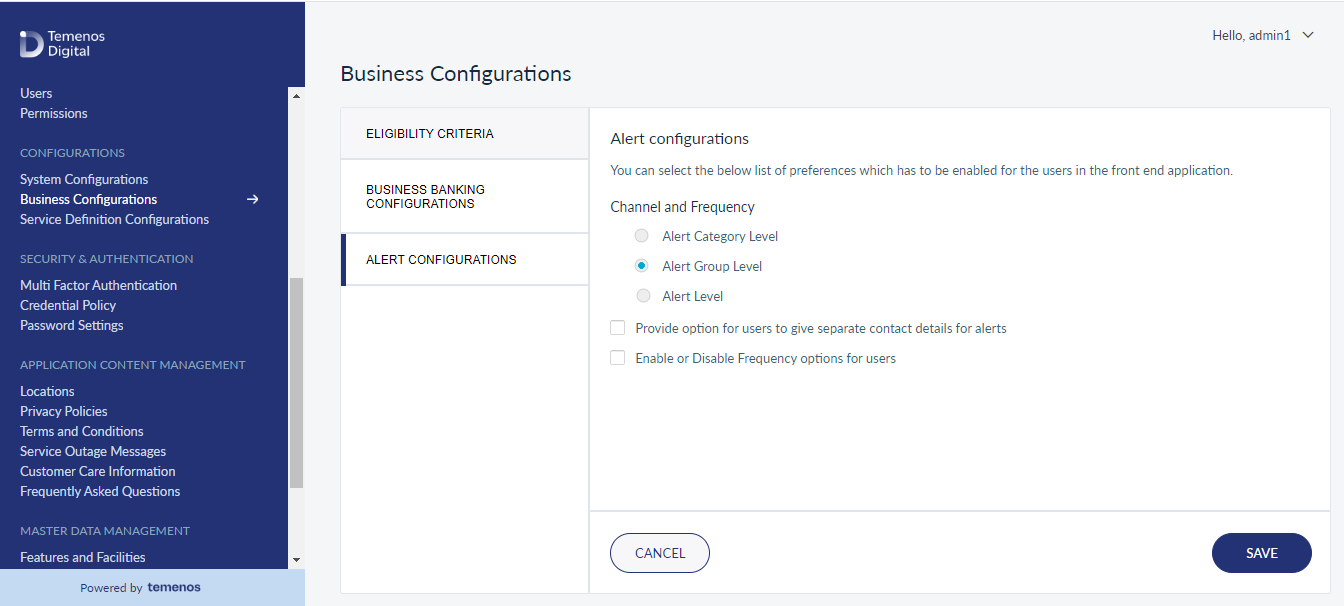
- Channel and Frequency
- Alert Category Level: If you select this option, the OLB application user can manage alert preferences (alert channels and frequency) at alert category level.
- Alert Group Level: If you select this option, the OLB application user can manage alert preferences (alert channels and frequency) at alert group level.
If the configuration is set at Category or Group, only the alerts which have attributes that needs to be managed are shown under each category or group, otherwise, only category or group is shown in the online banking application.
- Alert Level: If you select this option, the OLB application user can manage alert preferences (attributes, alert channels and frequency) at individual alert level.
Irrespective of the configuration, the attributes are managed at alert level.
- Separate Contact Details for Alerts: By default this option is disabled. When you enable this option, the OLB application user will have an option to add separate contact details to send the alerts. If this option remains disabled, the user will receive an alert on primary communication details.
- Frequency Options for Users: By default this option is disabled. If enabled, the Frequency option is enabled in the OLB application and the default values information is captured wherever it is applicable. If this option remains disabled, the frequency values given while creating a category or group are taken by default and the frequency option is not available in the OLB application.
When the configuration is at Category level or Group level, frequency is only applicable to the alerts which have frequency defined at alert level.
For more information on Maker-Checker Configurations, click here.
In this topic